


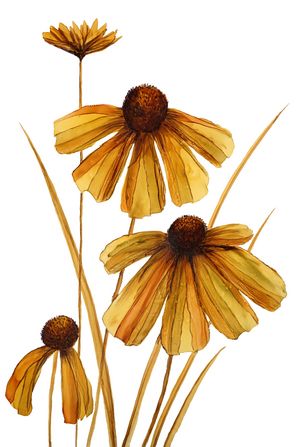
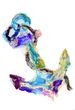
Floral Brush Strokes
The following tutorial was created in the course of our calendar project with the linked artist. In addition to this tutorial, there are eleven other techniques around the various applications for alcohol inks. The individual materials, steps and tips were written by the respective artist and summarized by us for the calendar. We hope you have fun trying them out!
Materials used:
- Paper (e.g. AMI or Lanavanguard)
- Isopropanol
- Mixing pallet
- Paper handkerchiefs
- Synthetic brushes
- Protective clothing
- Isopropanol
- UV varnish
Colors used:
Artist:@lana_art_belgium (link to instagram post)
Floral Brush Strokes
Step 1: "A rough sketch"
The first step is to prepare the workspace and get the materials ready. Then on a sheet of paper roughly pre-sketch the composition with a thin brush and light Alcohol Ink. This step is important so that in the painting process you can choose the right width, length and direction of the strokes. For the motif of a flower, it is easier to paint the direction of the petals towards the center, towards the stamen.
Step 2: "Colors of Autumn"
Octopus Fluids Alcohol Inks can be used not only as a pure shade, but also mixed together as you like in a plastic palette. For this autumnal theme, it's best to use warm, bright Alcohol Inks, such as "Carrot", "Sunlight", "Caramel", "Olive" and "Brownie" to capture the season in all its glory. For contrast, the blue-black "Shadow" is ideal. More shades in the picture make representational motifs look more realistic. Before you start painting, however, you should test the color samples of the mixed colors on a separate sheet of paper.
Step 3: "Get to the brushes".
Now it's time to paint. For the more transparent strokes, dilute the paint with isopropanol on the palette. For a richer color, use less isopropanol or paint directly with the undiluted ink. Larger patches of paint can easily be blown out with a hair dryer or lips to get a smoother coat. If the stroke is not successful, it can be easily removed with a paper tissue moistened with isopropyl alcohol. Use a thin brush for the details. When doing this, do not take too much ink on the brush so as not to smudge the colors.
Step 4: "Protect your artwork".
Alcohol ink leaves only a thin layer of color on the paper, so the painting must be protected from light and handling. Therefore, cover the finished painting with a layer of alcohol-free UV varnish.
 Octopus Fluids Alcohol Ink CARROT for fluid art and resin, orange
 Octopus Fluids Alcohol Ink SUNLIGHT for fluid art and resin, yellow
 Octopus Fluids Alcohol Ink Olive for fluid art and resin, green
 Octopus Fluids Alcohol Ink BROWNIE for fluid art and resin, brown
 Octopus Fluids Alcohol Ink CARAMEL for fluid art and resin, brown